In this guide we explain how to manage the tables you want to make available for booking online. Please note that this feature is not available in the basic plan. During your 30-days free trial you can switch to the premium plan for free and with no obligations if you want to test this feature.
The table management can only be accessed by the admins of your account. However, the reservations themselves can be handled by all users afterwards.
Step 1: Name your rooms
Go to your account settings (gear in the top right) and click on "Manage Rooms & Tables". There you can create and customize your rooms. As a first step, click on "Add a new room".

Step 2: Set the tables and define which ones should be available for online booking
Once you've set up a room you can click on "manage tables" next to your room on the right. Here you can create and name tables (i.e. T1 -T6), specify how many guests have space on each table and choose which ones should be bookable online.
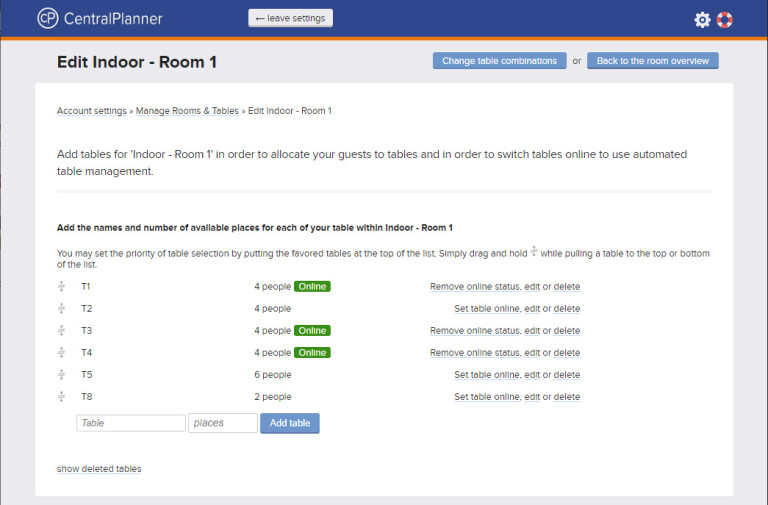
Afterwards you can change the order of your tables by dragging and dropping them by the arrow icons on the left. As available tables are being booked online from top to bottom of the list, you can prioritize them here. For example a booking for four people will pick the first available table in the list with four free seats. Only if no table with four seats is available anymore, CentralPlanner will take the next bigger one.